18 August 2009

Summer Rolls Madness


Today I volunteered to make dinner for my parents and brother, the only stipulation that I must use chicken as we happened to have a lot in the refrigerator. Unfortunately, as much as I love cooking I had a large lunch less than two hours prior and thus was really not feeling up to eating a lot of food.

As such I wanted something that would allow for a full meal for others eating and yet let me simply munch without wasting a lot of food. My vessel of choice in this endeavor: SUMMER ROLLS.


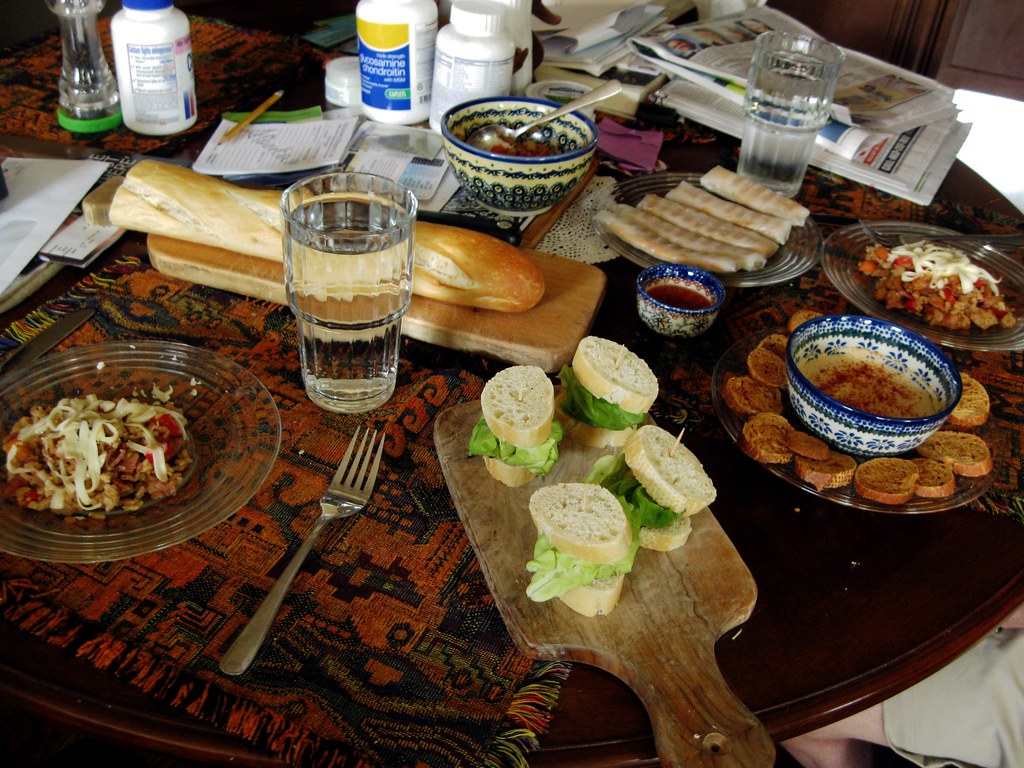
What I really love about summer rolls (and many East Asian dishes in general) is how flexible they are to modification, customization, and fusion with other flavours. With this in mind I decided on a Summer Roll sampler combining Vietnamese, Italian, and American palates which I paired with a simple salad and a rice dish. The meal was well received and tasted fine but ended up being too much food, which, all things considered is much better than the alternative.

Summer Roll Sampler
Ingredients*
3 large carrots
1 cucumber
3 chicken breasts
1/2 white onion
1 package rice noodles
peanuts
shallots
sundried tomatoes
lettuce
fresh chives
fresh cilantro
rice paper
olive oil
chili oil

*see below for specific summer roll recipes

- Kitchen Prep
  1. Cut the carrots into thin strips (or shave them with a potato peeler).
  2. Cut the cucumber into strips (slice lengthwise).
  3. Finely dice the white onion.
  4. Remove the white roots from the shallots. Cut them in half.
  5. Drain the oil off the sundried tomatoes (if from a jar) or the water (if rehydrated). Slice the tomatoes into strips.
  6. Shred the lettuce into small strips.
  7. Finely chop the peanuts.
  8. Boil the noodles for approximately seven minutes or until cooked.
  9. Rinse in cold water and then submerge until ready to use.
  10. Cut the chicken into strips and lightly fry in a frying pan with olive and chili oil.
  11. Gently pat the chicken to remove the oil and cut into thin strips.
- Assembling the rolls
  1. Submerge the rice paper in lukewarm water for 15 seconds or until soft.
  2. Lay out rice paper on a smooth, flat surface.
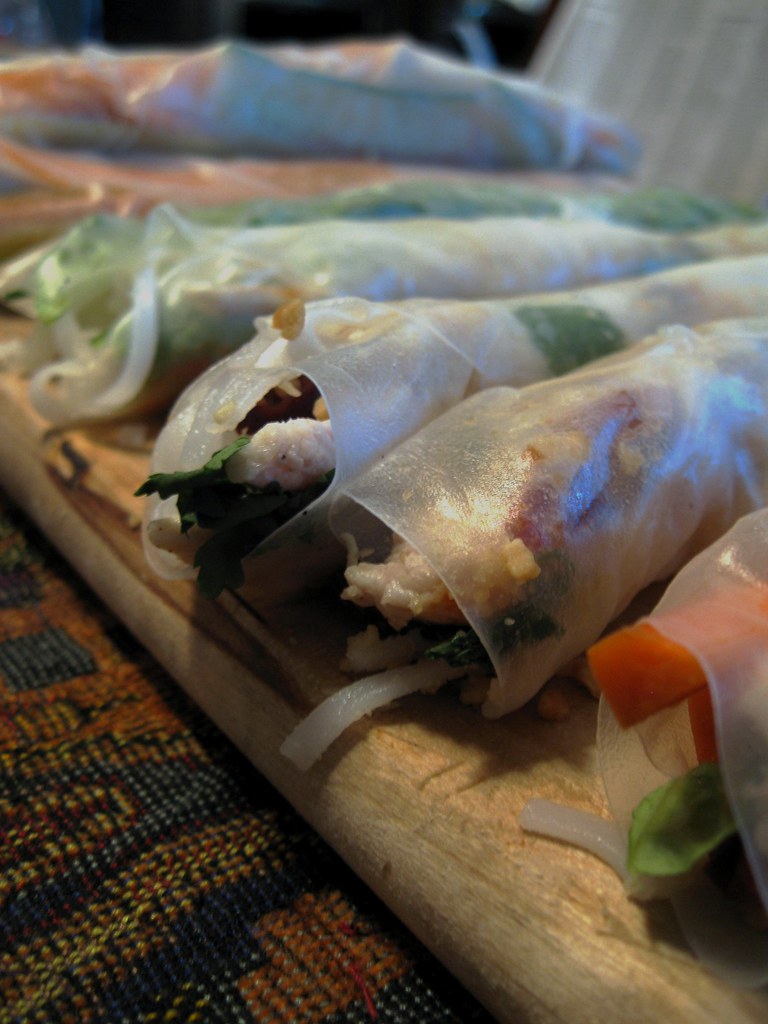
  3. Place the ingredients below onto middle the rice paper (forming a line across the center) in the order the are listed.
  4. Carefully roll up the rice paper (try to make it as tight as possible).
Summer Roll #1
Carrots, cucumber, chicken, shallots, noodles

Summer Roll #2
Lettuce, chicken, onions, sriracha, chives, noodles

Summer Roll #3
chicken, sundried tomatoes, peanuts, cilantro, noodles.


NOTES:
When making the summer rolls, it is important to ensure you have enough of all of the ingredients so that when you go to roll them your ensure you do not end up with three rolls of what you wanted to create and a bunch of rolls with only cucumbers or carrots.

SUGGESTIONS
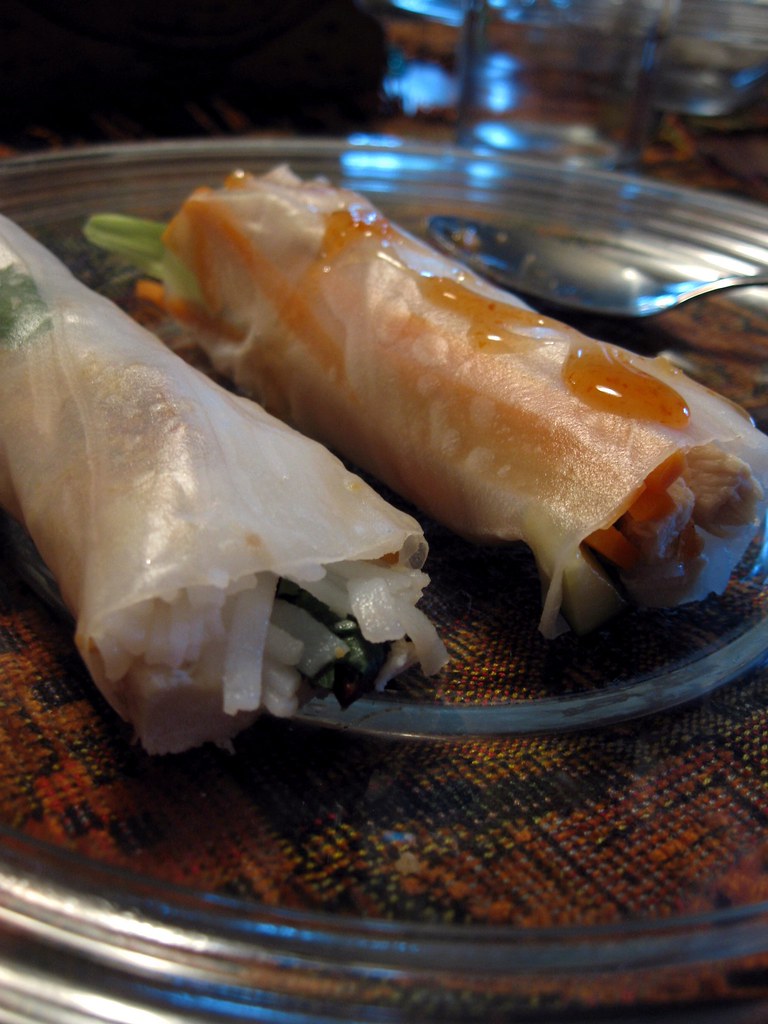
The Summer Roll #2 was especially popular but as I mentioned before feel free to add or subtract ingredients as you like.

Peanut Sauce
Ingredients
2 tsp Haosin Sauce
1 tbsp Sate Sauce
2 tsp Soy Sauce
1 tsp Chili Oil
1/2 Lemon
1/2 tsp Chili paste
1/2 tsp Garlic paste
A dash sriracha
Warm water
  1. Add all ingredients to a bowl and mix well.
  2. Doctor quantities for taste.
NOTES:
This is a great peanut sauce, not just for dipping summer roles
If you are having difficulty mixing the sauce, heat the mixture up in the microwave for 20 seconds and try stirring it quickly with a toothpick.

09 August 2009

Deconstructed Ice Cream Sandwich


Tonight I once again found myself bored and aimlessly wandering towards the kitchen, thinking about something sweet that I could nibble upon. Looking through the pantry I found some cookies, brownies, and chocolate bars, none of which really struck my fancy. The fridge yielded a variety of soy and dairy ice creams and ice cream snacks, but to similar results.

Dismayed I was about to look at pull up some recipes for inspiration, until I remembered a something I had read recently about a deconstructed caesar salad (all the rage in experimental gastronomy) and I had an idea: I will make a deconstructed ice cream sandwich.

For this recipe, I just used random dessert-y items that I had lying around my kitchen that I happen to like, but feel free to use anything — this is a dish that really appeals to the individual, so let your imagination run wild. This is a fun dish to make and something that can be easily whipped up in five minutes if you are looking for a quick fix, or become an involved process if you are striving for the truly unique.

Deconstructed Ice Cream Sandwich

Ingredients
Ice Cream Sandwich
Chocolate Sauce (for simplicity I used Smucker's Chocolate Topping)
Chopped Peanuts (I used dry roasted peanuts, but any will do)
Whipped Cream
Chocolate Bar (I used Endangered Species: Dark Chocolate with Espresso Beans)
Strawberry

Before you start I would but the ice cream bar in the coldest part of the fridge and leave it there until the last moment before you need it, because the colder it is the more likely the ice cream is to stay together as one solid piece (making it much easier to work with)
  1. Heat up the chocolate sauce until it is a liquid and pour in onto a plate, forming a small pool slightly bigger that the ice cream bar. Place this in the fridge to cool for a few minutes.
  2. Break a few good size chunks off of the chocolate bar. Finely shave one of them and set both the shavings and the remaining chunks to the side. (I choose a bar that was more than just chocolate to contrast with the pure chocolate 'cookie' of the ice cream sandwich, but feel free to use any type you like)
  3. Hull the strawberry (or otherwise prepare which ever fruit you choose). Set aside

  4. Remove the ice cream sandwich from the fridge and quickly peel off the cookie, placing it to the side. Try to take off both cookies, but if you can only remove one side that is okay too. (If you can remove neither without breaking the ice cream 'bar,' place the sandwich back in the fridge to cool move —perhaps try covering it with ice)
  5. Place the ice cream onto the pool of chocolate sauce (if there is still is a cookie on one side, place that side down, so the ice cream side faces up.
  6. Sprinkle the chocolate shavings and chopped nuts on top of the ice cream.
  7. Shred the cookie that you removed from the sandwich and place it along one side of the ice cream.
  8. On the opposite side of the ice cream piece place two dots of whipped cream. In one place the strawberry and the other the remaining chunks of chocolate.
  9. Serve immediately.

NOTES:
  • The ice cream sandwich will melt very quickly once out of the fridge, so work fast. Also the cookie tends to be very sticky, so be careful when you are removing it/placing it on the plate.
  • The point of this recipe is to take a conventional favourite and make into something different yet have it still be recognizable as an ice cream sandwich (postmodern cooking). As such, choose any toppings that you like but try to use them sparingly or don't just heap them on.
SUGGESTIONS:
  • Other garnishes that would be great include: shredded coconut, espresso beans, caramelised sugar, a fruit sauce, dusting of cinnamon, cocoa, or powdered sugar, or substituting the 'cookie' from the ice cream sandwich with another form of biscuit.
  • If you to use a fruit sauce or coulis, but don't have one on hand, make your own. Try stirring jam and red wine on a low heat until a thick liquid and pour immediately.

04 August 2009

Instant Crêpe Dessert

When I finished making the Carmelised Onion Focaccia, I was left with a half cup of flour I didn't want to go to waste. After mulling over this for a few seconds, I decided to use it to partake in one of my favourite culinary past times: throwing things together and hoping for the best.

What I essentially ended up with was crêpe sucre a la mode with a coffee infused chocolate sauce and a cookie garnish. It sounds complicated but actually was extremely easy. In addition all I used were things I had laying around my kitchen already.

Instant Crêpe Dessert
Crêpe
1/2 cup flour
1 egg
1/4 cup skim milk
sugar

Sweet Filling
sugar
light cream cheese (thinly sliced)
cinnamon
  1. Add all the ingredients into a small bowl and beat until smooth. If the flour clumps, do not worry (this happened to me) and simply strain the mixture through a fine strainer (such as those used for powdered sugar) or a sifter.
  2. Pour onto a heated non-stick frying pan until the entire bottom is coated (I used the pan from when I carmelised the onions for just a bit more sweet flavour)
  3. Wait until a thin skin has hardened across the entire top of the batter and then sprinkle sugar and cinnamon on one half of the crêpe. Then place the thinly sliced pieces of cream cheese on top of the sugar/cinnamon and dust with more sugar on.
  4. At this point fold the crêpe in half with a spatula, pressing it down so that the half without the sugar completely covers and solidly connects with the sugared half.
  5. Keep the folded crêpe on the stove until the sugar has melted, occasionally turning it over to prevent burning,
Coffee infused Chocolate Sauce

Chocolate Sauce (I used Smucker's Chocolate Topping)
Cold Coffee (I used some leftover in my french press)
  1. Heat the chocolate sauce in the microwave until very runny.
  2. Pour some into a bowl. Immediately pour the coffee over it.
  3. While the chocolate sauce is still hot, mix the two liquids together (I used a toothpick) until they are combined.
  4. Heat up the mixture in the microwave again and serve.
Plating instructions
Crêpe Sucre
Coffee Infused Chocolate Sauce
Ice Cream (I used Co-op Fudge Sundae Surpreme)
A Chocolate Cookie
  1. After cooking the crêpe, fold it again (into quarters) and place in the fridge to chill.
  2. After it has cooled, place it on a dish (warning, the sugar filling might spill out everywhere, it will still be a liquid)
  3. Add one scoop of ice cream onto the crêpe.
  4. Pour the sauce generously over the crêpe and the ice cream.
  5. Garnish with a piece of a chocolate cookie and serve.

NOTES:
  • The chocolate sauce tends to have a weak chocolate flavour and an even weaker coffee flavour so don't be afraid to use a lot.
  • The reason that this is called an 'instant' crêpe is that this recipe does not call for you to chill the batter like most crêpes - hence it is great for impulsive or impatient people like myself.

Carmelised Onion Focaccia


One thing that I have been afraid of messing with for a while now is dry yeast. For some reason I saw it as this 'technical level' that I had not reached or was simply afraid of trying. However, one day my curiosity overcame even this deep-set fear.

What finally pushed me over the edge was this Focaccia recipe from Bay Area Bites. I decided it looked too simple not to try and unlike all the other recipes I had seen, it did not call for large amounts of fresh rosemary, a spice I was conspicuously lacking at the time, but instead had suggestions for alternatives.

Anyway, after a brief panic attack at not being able to find my sea salt, I had the dough made and decided to really jazz the recipe up:

Carmelised Onion Focaccia
2 tbsp active dry yeast

1 1/2 cups warm water

1 tsp sugar

4-5 cups of flour
 (1 1/2 wheat, 2-3 1/2 bread)
1 tsp sea salt (for this step I used coarse sea salt)

4 tbsp olive oil

1 tbsp chili oil

Toppings (what I used but feel free to experiment)
1 tbsp coarse sea salt

1 tsp chopped fresh chives

1 cup carmelized onions
1/4 cup sundried tomatoes
3 cloves slices garlic

METHOD BY HAND
  1. In a large bowl, dissolve yeast and sugar in the warm water. Let sit for five minutes or until the mixture becomes foamy.
  2. Stir 4 cups of flour (1.5 wheat, 2.5 bread), 1 1/2 tsp salt, and 2 1/3 tbsp olive oil, 2 tsp chili oil into the yeast mixture and then stir thoroughly until you can make a rough ball. You will probably need to use your hands.
  3. Sprinkle flour onto a work surface (either a solid counter top or large wooden board) and turn the dough out onto the floured surface.
  4. Knead the dough for at least five minutes, adding the last cup of flour as needed to prevent the dough from getting too sticky. You may not need the full cup. Continue kneading until the dough is smooth.
  5. Set the dough in large bowl coated with olive oil. Cover with a dish towel and set in a warm draft-free spot for at least an hour or until the dough doubles in size.

  6. After the dough has risen, coat the bottom of a large cookie sheet with the remaining 1 2/3 tbsp olive oil and 1 tsp chili oil.
  7. Turn the dough onto the oiled cookie sheet and press down so it fits into the pan. If the dough does not stretch, let it rest another five or 10 minutes covered with the dish towel.
  8. Cover with a dish towel and let rise for another hour.
  9. Press your fingers into the dough to dimple it. This will help the dough bake evenly and prevent it from inflating too much when baking.
  10. Sprinkle the course salt, chives, tomatoes, garlic, onions and more chili oil onto the dough.

BREAD ATTACHMENT METHOD
  1. In your mixer's bowl, dissolve yeast and sugar in the warm water. Let sit for five minutes or until the mixture becomes foamy.
  2. Add 4 cups of flour (1.5 wheat, 2.5 bread), 1 1/2 tsp salt, and 2 1/3 tbsp olive oil, 2 tsp chili oil into the yeast mixture. Using the bread dough attachment, mix until a rough ball forms.
  3. Sprinkle flour onto a work surface (either a solid counter top or large wooden board) and turn the dough out onto the floured surface.
  4. Knead the dough for at least five minutes, adding the last cup of flour as needed to prevent the dough from getting too sticky. You may not need the full cup. Continue kneading until the dough is smooth.
  5. Set dough in large bowl coated with olive oil. Cover with a dish towel and set in a warm draft-free spot for at least an hour or until the dough doubles in size
  6. After dough has risen, coat the bottom of a large cookie sheet with the remaining 1 2/3 tbsp olive oil and 1 tsp chili oil.
  7. Turn the dough onto the oiled cookie sheet and press down so it fits into the pan. If the dough does not stretch, let it rest another five or 10 minutes covered with the dish towel.
  8. Cover with a dish towel and let rise for another hour.
  9. Press your fingers into the dough to dimple it. This will help the dough bake evenly and prevent it from inflating too much when baking.
  10. Sprinkle the course salt, chives, tomatoes, garlic, onions and more chili oil onto the dough.

  11. Set dough in a preheated 450 degree oven.
  12. Bake for about 15 – 20 minutes or until golden brown.

NOTES:
  • The focaccia dries out in about 2 days (even if in saran wrap and a ziplocked back) so consume it quickly — good for parties.
  • The sun dried tomatoes (as the had no water in them and most of the oil had been wiped off, burned well before the bread was done. In the future either push them into the dough itself, add them much later in the cooking, or make sure they are fully coated in oil.
  • The focaccia tasted great, but the toppings didn't really stand out so I would suggest: tripling the chives, and doubling the amount of salt, garlic, and onions (but I really like lots of flavour to things)
SUGGESTIONS:
  • Try pushing most of the toppings into the dough so they really diffuse their flavour into it. However, remember to keep a few bits on the top, if only for aesthetic value.
  • The bread works very well as sandwich-making material, especially if it is beginning to go dry.
  • If the focaccia becomes very dry, do not fear, use it as croutons in salads.
  • If you have leftover flour (from step 4) why not try this.

01 August 2009

Triple Layer Brownies


The important thing to know about me before you read any further is that I have a terrible weakness for making pretty sweets. I love the process of finding recipes, I love imagining how they will taste, I love watching them take shape and I love photographing them. (Un)fortunately I don't really enjoy eating them all that much. As such I try to limit myself to making them only for parties or on special occasions few and far between (otherwise my house would be overrun with untouched, cookies, cakes, pies and cupcakes).

A few days ago, I finally gave in. I had been watching our horde of cookies slowly dwindle away into nothingness and as soon I saw there were only two cookies left, I grabbed my recipes, the internet and started looking for what to replace them with.

What I eventually found were two brownie recipes: Butterscotch-Coconut brownies and Blondie and Chocolate Marbled brownies. After some time of deliberation and a quick twitter straw poll, I decided not to make one or the other, but instead both... combined.

It was not as simple making both batters and throwing them into an 8x8 pan; they were different recipes so there would be need to be some acclimating. First of all, each brownie recipes were designed to stand alone, one filling the pan, let alone both. As such I needed to reduce the recipes' size. Unfortunately, where one was a recipe for an 8x8 batch of brownies, the other was for a 13x9 pan. This meant that I had to do a little more math than I originally intended.

After few quick calculations, I ended up with some rather odd fractions (such as 2/9 cup). To remedy this, I smudged a few numbers, cut and pasted, and came up with this as the final recipe.

Triple Layer Brownies
Butterscotch Coconut Mixture (set 1)
1/8 cup (25g) butter
1/2 cup brown sugar
1/2 egg (whisk an egg and then split into two bowls, use one)
1/2 teaspoon vanilla
3/8 cup flour
1/2 tsp baking powder
1/2 tsp salt
1/4 cup shredded coconut
--
Blondie Mixture (set 2)
1/3 cup vegetable oil
3/4 cup light brown sugar
1 cup flour
1 egg
2/3 tsp baking powder
1/3 tsp salt
1/6 cup nuts
--
To make the Chocolate Mixture (set 3)
1/4 cup chocolate chips
4 tsp cocoa

Preheat the oven to 350°F (luckily this was the same for both recipes). Butter and flour an 8x8 pan.
  1. Melt butter in a medium, heavy saucepan.
  2. In a large bowl, mix together oil and light brown sugar. Then add the whole egg and beat until smooth.
  3. In a separate bowl, sift together flour baking powder and salt (from set 2) and then add them to the brown sugar mixture. Mix well.
  4. At this point divide this mixture into two bowls (you can use the 'dry ingredients' bowl as your second bowl to save clean up) and set to aside.
  5. Stir brown sugar (from set 1) into the saucepan until incorporated.
  6. Cool slightly.
  7. Beat in vanilla and the half an egg.
  8. Sift in the flour, baking powder, and salt (from set 1) into the pan and stir to combine
  9. Fold in coconut.
  10. Spread the mixture on the bottom of the prepared pan.
  11. Into one of the two bowls you have (from before) add the chopped nuts (I used honey roasted macadamia but any will do) and stir well.
  12. Spread this mixture on the first layer in the pan
  13. Into the other bowl add the cocoa powder and chocolate chips.
  14. Spread this layer on top of the first two.
  15. Bake for 25-30 minutes or until a toothpick in the centre comes out clean.

NOTES:
  • The batter for all three of the layers was very thick (don't worry) and I would suggest spreading it with a knife, not a spatula.
  • It might be aethetically more pleasing to put the chocolate layer in the centre of the brownie instead of on the top. It would also then be easier to tell when the layer is fully spread out as both the blondie layer and the butterscotch layer are the same colour.
  • The brownies stuck to the plan (very sticky) so make sure that the pan is really buttered.

French Toast


This morning I decided that I deserved a little treat; something special to help me through the day. What I had been craving recently was cinnamon rolls, but since I didn't have any dough ready, I decided to turn to the next best thing: French Toast.

The recipe that I choose for this culinary adventure was one forwarded to me by my good friend Ma'ayan and was Double Vanilla French Toast (stolen from Pithy and Cleaver). This is something that I had been drooling over for weeks now but I hadn't had the occasion to make yet so as I got to work I could barely contain my excitement.

Unfortunately I immediately ran into a number of problems, namely missing a variety of [crucial] ingredients. As such I have substituted accordingly (see link for original recipe). I also made a half recipe because I intended to serve one not two but I still had too much food.

Variation on Double Vanilla French Toast
2 organic eggs
1/2 cup skim milk
1/4 tsp baking powder
1/4 tsp ground cinnamon
1/8 tsp fresh ground nutmeg
a pinch of cayenne pepper
1 tbsp vanilla extract
6 or 7 thin slices artisan wheat bread
butter for the pan
  1. Whisk eggs, milk, baking powder, cinnamon, cayenne, and nutmeg in a large bowl.
  2. Stir in vanilla extract
  3. Heat non-stick pan over medium heat and add a small pat of butter, moving butter around until it melts.
  4. Submerge each slice of bread in the egg mixture, making sure it is fully coated, and then let excess drip off.
  5. Add to skillet, repeat with other slices.
  6. Cook until lightly browned on each side, turning frequently to avoid burning.
  7. Serve hot with Grade A Maple syrup.


NOTES:
  • The french toast was, while pretty, unfortunately relatively tasteless. Here are the most likely culprits:
  • Instead of white bread I used wheat, which overpowered the relatively delicate spices.
  • The wheat bread was also very dense, soaking up a lot of liquid ergo requiring much longer to cook.
  • I did not use a vanilla bean. (This is a huge amount of flavour, which I didn't take into consideration and forgot to accommodate at all)
  • Too little spice, i.e. I believe I erred on the side of having too little as opposed to too much and since I managed to do twice as many slices of bread as intended, I think the spice was spread pretty thin.
  • Also the bread was chewy, which I again attribute to my choice of dense wheat bread over a fluffier white choice (such as brioche)

Leftovers Reimagined

A few days ago, my father (who I am staying with this summer) turned to me and said "What do you want for dinner?" "I don't care" (my stock response) came flying out before I had even fully comprehended the question. "Okay, we'll just have the fried rice," he responded. This was, of course, referring to the epic amounts of friend rice that I had made few days ago after I misjudged how much the recipe made. However, rather than just serve the same dish twice, I like my food to be interesting. For this reason, when I was biking home that day, I was suddenly had a brilliant plan to spice up an otherwise bland leftover meal; I called it Leftovers Reimagined.

Basically my premise was simple. I decided to see how many dishes I could make based predominantly around Fried Rice. Later I added the other leftovers in the fridge (quite a few odds and ends) to the challenge so I could truly have my hand at 'reimagining' a variety of leftovers. The concept came to me as a sort of Iron Chef: Battle Fried Rice and, as such, I got quite excited. The only rule that I gave myself was that I was to buy as little things as possible (really focus on just using what we had) and that all of the fried rice dishes had to maintain an Asian flair (taste) yet not taste like any of the others, or the original fried rice.

After popping off to the store to pick up a few things (I spent less than $3.50) I was ready to begin. This is what I was working with:

LEFTOVERS (and stuff at the end of its life):
Fried Rice
Misc. seasoned chicken and veg.
Roasted red pepper
Half a lime
Butter Lettuce
Tomatoes
A dessicated Lemon
Bacon
INGREDIENTS AROUND THE HOUSE
Chickpeas
Spices
Sauces
Lemons
Soy Cheese
Rice Paper
INGREDIENTS I BOUGHT
Baguette (very thin)
Peanuts
Spring Onions

Using these as my ingredients combined with out of the box thinking and an obsession with plating as my muse I came up with the concept of a tapas style meal:
  • Roasted red pepper hummus with toasted bread 'crackers'
  • Bitesize chicken-lettuce wrap sandwiches
  • Asian-fusion bruschetta
  • Spicy grilled puréed fried rice rolls
  • Western fried rice

(For dessert I was going to make Butter Mochi, but lacked the ingredients and time)
--

The process was relatively simple:
Roasted red pepper hummus and toasted bread 'crackers'

This I finished before heading to the store; it is idiot-proof and can be made and stored way in advance. Basically, I used a recipe (chickpeas, tahini, lemon, etc...) from my friend Ma'ayan's mother and threw everything I needed into a food processor, puréeing untill creamy. I then added the roasted red pepper I had lying about and puréed that until incorporated. Later I threw some thinly slice baguette into an over at 350°F for about ten minutes to make the chips and I served then side by side, with a dusting of cayenne pepper

Bitesize chicken-lettuce wrap sandwiches

I took the misc. chicken & veg. that I had (a very small amount) and divided it into four equal parts. I then wrapped each in a butter lettuce leaf before putting that between two slices of baguette and adding a toothpick for structural integrity. note: this the first dish made should be stored in the fridge to keep the bread from drying out.

Asian-fusion bruschetta

For this I first doused a tomato in soy sauce, a bit o olive oil, salt and pepper before roasting it in the oven. I then diced it while hot and added it to a bowl of fried rice that had been doctored with lime juice and a splash of soy. This was served with slices of baguette (uncooked) but actually was a bit nicer when paired with the bread crackers (more of a contrast of textures) from the hummus.

Spicy grilled puréed fried rice rolls
This was the item that least labour-intensive, yet most exciting to make. Basically, I took fried rice, added chopped peanuts, spring onions, and a dash of Sriracha, and puréed the lot in a food processor until a paste. I then separated the mixture into little clumps, placed each on a sheet rice paper and rolled them into tight tubes. I let them sit until right before the I served dinner and then quickly grilled them on a panini press and served them with a sweet chili sauce for dipping.

Western fried rice

At the end of it all, I still had a very small amount of fried rice left over that I was originally planning to serve plain. However, even with time on the line, I decided to do otherwise. I cooked up the small amount of bacon left in my fridge and crumbled it into the fried rice; I added more oyster sauce and heated the entire thing up in the microwave. I then served it hot with soy cheese on the side (my father has a dairy allergy) that you sprinkled on the still-hot fried rice, so it would melt onto the fried rice but not get all clumpy or messy in the microwave before it was served.

Dinner is served

--

In the end, this entire process (besides the hummus, made in the early afternoon) took about an hour (the time it took for my tomato to roast) and turned out pretty tasty. There are things that I would change (as with whenever one cooks, but that is what cooking is: one part food love, one part vanity, one hunger, and ten parts mistakes and triumphs to learn from).