Showing posts with label dessert. Show all posts

07 January 2010

Georgias

A few weeks ago I was in the mood to make some cookies unfortunately, as I often find myself, I lacked both the time and the ingredients necessary to make my cookies of choice. Inevitably, I was drawn to the internet for the solution to my conundrum. The result of this meandering was that I not only found a fantastic new recipe for a cream cheese based cookies, but also a very good use for the 12 oz. of cream cheese I had happened to procure.

When I originally made this recipe, I put little chocolate chips on the tops of all the cookies save one which I dropped a bit of jam on, just as an experiment. While all of the cookies were a big success, the one cookie with jam was fantastic which got me thinking.
GEORGIAS
Ingredients

1 cup butter, softened
1 (3 ounce) package cream cheese, softened
1 cup dimari sugar
1 egg yolk
1/2 teaspoon vanilla extract
2 1/2 cups all-purpose flour
1 Tbsp cream
2 tbsp sugar
1 tbsp cinnamon
Powdered Sugar

Directions
  1. Preheat oven to 325 degrees F. Layer cookie sheets with parchment paper.
  2. In a large bowl, cream together butter, cream cheese, and sugar until light and fluffy. Beat in egg yolk, cream, and vanilla. Stir in flour until well blended. Divide dough into two batches.
  3. Using one batch of dough, drop by spoonfuls onto the cookie sheets and press into approximately 1” flat circles.
  4. Using a 1/2 tsp measure, depress small indentations into all of the cookies and then fill with strawberry jam (can be substituted for others). In a small bowl mix together the sugar and cinnamon.
  5. Roll out the other batch of dough to approximately 1/4”. Slice into 1/2” by 1 1/2” strips.
  6. Place one strip in the powdered sugar and one strip in the cinnamon-sugar mixture and then place both of the strips on the cookie (see picture).
  7. Repeat for all cookies. If the dough becomes to dry (and starts to crack) just roll it out again.
  8. Bake for 15 minutes in preheated oven. Cookies should be pale.
  9. After cooled on a wire rack, these cookies can be stored in an airtight container and keep well.

28 September 2009

Apple Cake

Autumn is a time of the year that I have always loved. I am not sure whether it is the brisk chill of the wind as it bites through your clothes or the orchestra of colours conducted throughout the forests as the leaves begin to fall, but it whatever it is, it always gets to me. It is a very personal and reflective time of the year for me... but it is also a time for apples.

I love apples, or I should say, I now love apples. For a large portion of my life I was a relatively picky eater and didn't eat a lot of fruit. I didn't really eat a lot of variety at all even, unless it was unwillingly forced down my throat. Fortunately that has since changed, and with it has come a greater appreciation for the quintessential America fruit.

Now, as much as I enjoy eating the simplistic 'apple slices' (either plain, with peanut butter, or with honey as the occasion may mandate) another item I have gained a real appreciation for is apple-baked goods — such as apple cake.

My reason for making apple cake on this particular day was that I was required to bring in a dish for a photography critique in my class and since it is now fall, the cooperative where I eat just received a shipment of fresh local apples. Also, I had helped my friend make this particular cake a few weeks before (for a similar reason) and so I was fairly confident it would work.


Apple Cake
1 1/4 cups white sugar
2 cups all-purpose flour
2 teaspoons ground cinnamon
2 teaspoons baking soda
pinch of nutmeg
1/4 teaspoon salt
2 eggs
1/2 cup vegetable oil
2 1/4 teaspoons vanilla extract
1 cup chopped walnuts (optional)
5 1/2 cups chopped apples
Freshly whipped cream (optional)
  1. Preheat oven to 325 degrees F (165 degrees C).
  2. In a medium bowl, stir together the sugar, flour, cinnamon, and baking soda. Add the eggs, oil and vanilla, mix well. Add the nuts and apple, mix until all of the apples are evenly coated. Pour into a greased 9x9 inch pan.
  3. Bake for 75-90 minutes in the preheated oven or until a knife inserted comes out clean. Serve warm or cool, garnished with freshly whipped cream


Freshly Whipped Cream
1 cup Heavy [whipping] cream
1/2 cup white cane sugar
2 teaspoons vanilla

  1. Pour the creme and vanilla into a bowl and begin to beat (preferably with a hand mixer, but a whisk works as well)
  2. Slowly add the sugar
  3. Beat until peaks form
  4. Use immediately (will begin to sag within hours)

NOTES:

SUGGESTIONS:

09 August 2009

Deconstructed Ice Cream Sandwich


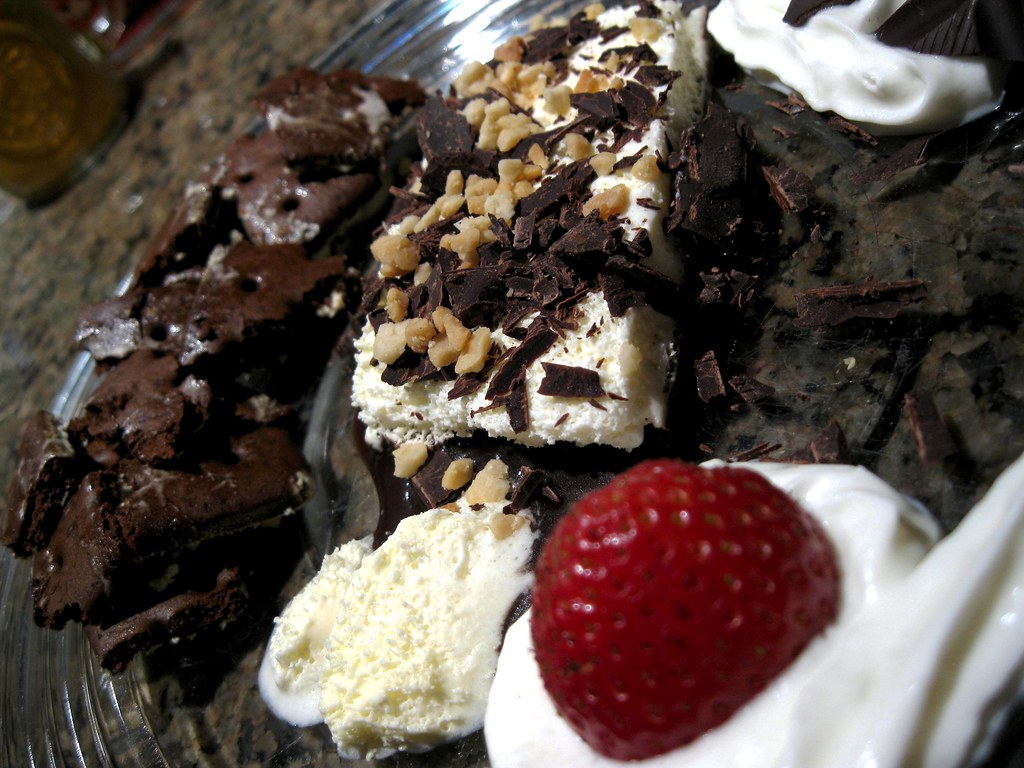
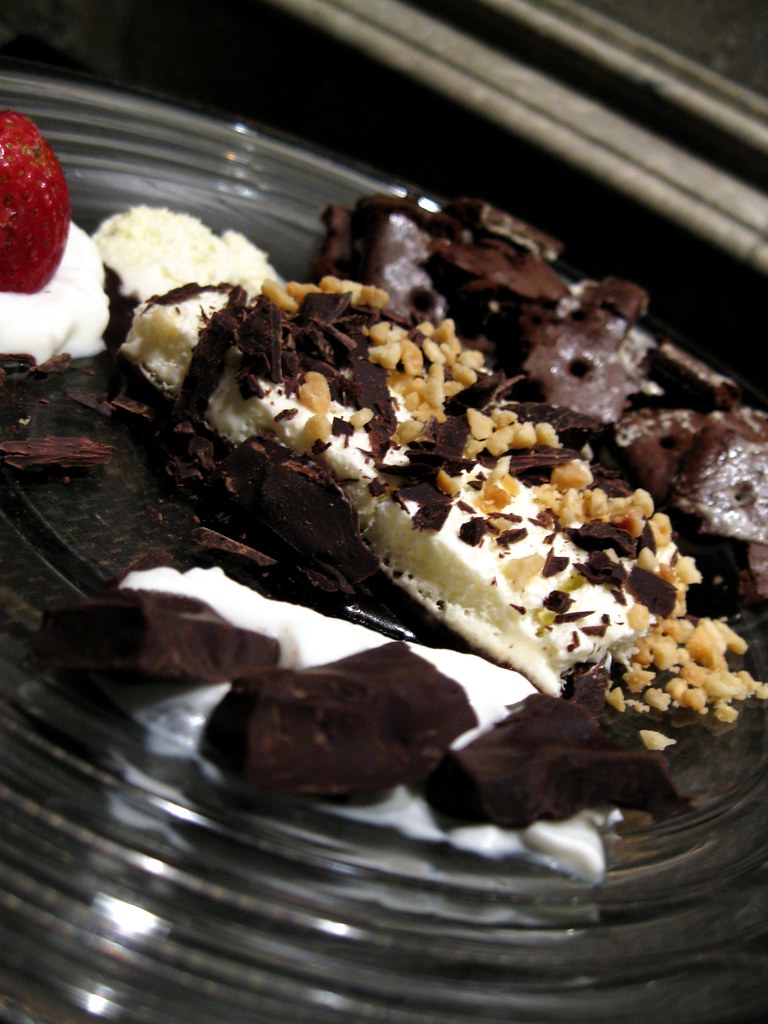
Tonight I once again found myself bored and aimlessly wandering towards the kitchen, thinking about something sweet that I could nibble upon. Looking through the pantry I found some cookies, brownies, and chocolate bars, none of which really struck my fancy. The fridge yielded a variety of soy and dairy ice creams and ice cream snacks, but to similar results.

Dismayed I was about to look at pull up some recipes for inspiration, until I remembered a something I had read recently about a deconstructed caesar salad (all the rage in experimental gastronomy) and I had an idea: I will make a deconstructed ice cream sandwich.

For this recipe, I just used random dessert-y items that I had lying around my kitchen that I happen to like, but feel free to use anything — this is a dish that really appeals to the individual, so let your imagination run wild. This is a fun dish to make and something that can be easily whipped up in five minutes if you are looking for a quick fix, or become an involved process if you are striving for the truly unique.

Deconstructed Ice Cream Sandwich

Ingredients
Ice Cream Sandwich
Chocolate Sauce (for simplicity I used Smucker's Chocolate Topping)
Chopped Peanuts (I used dry roasted peanuts, but any will do)
Whipped Cream
Chocolate Bar (I used Endangered Species: Dark Chocolate with Espresso Beans)
Strawberry

Before you start I would but the ice cream bar in the coldest part of the fridge and leave it there until the last moment before you need it, because the colder it is the more likely the ice cream is to stay together as one solid piece (making it much easier to work with)
  1. Heat up the chocolate sauce until it is a liquid and pour in onto a plate, forming a small pool slightly bigger that the ice cream bar. Place this in the fridge to cool for a few minutes.
  2. Break a few good size chunks off of the chocolate bar. Finely shave one of them and set both the shavings and the remaining chunks to the side. (I choose a bar that was more than just chocolate to contrast with the pure chocolate 'cookie' of the ice cream sandwich, but feel free to use any type you like)
  3. Hull the strawberry (or otherwise prepare which ever fruit you choose). Set aside

  4. Remove the ice cream sandwich from the fridge and quickly peel off the cookie, placing it to the side. Try to take off both cookies, but if you can only remove one side that is okay too. (If you can remove neither without breaking the ice cream 'bar,' place the sandwich back in the fridge to cool move —perhaps try covering it with ice)
  5. Place the ice cream onto the pool of chocolate sauce (if there is still is a cookie on one side, place that side down, so the ice cream side faces up.
  6. Sprinkle the chocolate shavings and chopped nuts on top of the ice cream.
  7. Shred the cookie that you removed from the sandwich and place it along one side of the ice cream.
  8. On the opposite side of the ice cream piece place two dots of whipped cream. In one place the strawberry and the other the remaining chunks of chocolate.
  9. Serve immediately.

NOTES:
  • The ice cream sandwich will melt very quickly once out of the fridge, so work fast. Also the cookie tends to be very sticky, so be careful when you are removing it/placing it on the plate.
  • The point of this recipe is to take a conventional favourite and make into something different yet have it still be recognizable as an ice cream sandwich (postmodern cooking). As such, choose any toppings that you like but try to use them sparingly or don't just heap them on.
SUGGESTIONS:
  • Other garnishes that would be great include: shredded coconut, espresso beans, caramelised sugar, a fruit sauce, dusting of cinnamon, cocoa, or powdered sugar, or substituting the 'cookie' from the ice cream sandwich with another form of biscuit.
  • If you to use a fruit sauce or coulis, but don't have one on hand, make your own. Try stirring jam and red wine on a low heat until a thick liquid and pour immediately.

04 August 2009

Instant Crêpe Dessert

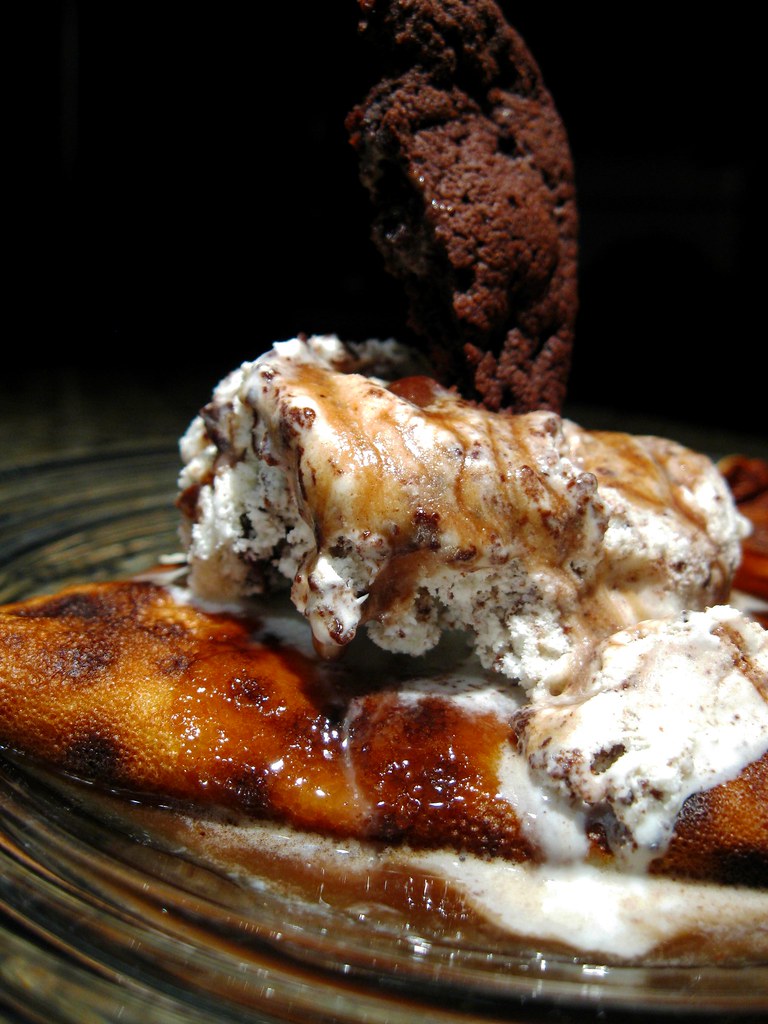
When I finished making the Carmelised Onion Focaccia, I was left with a half cup of flour I didn't want to go to waste. After mulling over this for a few seconds, I decided to use it to partake in one of my favourite culinary past times: throwing things together and hoping for the best.

What I essentially ended up with was crêpe sucre a la mode with a coffee infused chocolate sauce and a cookie garnish. It sounds complicated but actually was extremely easy. In addition all I used were things I had laying around my kitchen already.

Instant Crêpe Dessert
Crêpe
1/2 cup flour
1 egg
1/4 cup skim milk
sugar

Sweet Filling
sugar
light cream cheese (thinly sliced)
cinnamon
  1. Add all the ingredients into a small bowl and beat until smooth. If the flour clumps, do not worry (this happened to me) and simply strain the mixture through a fine strainer (such as those used for powdered sugar) or a sifter.
  2. Pour onto a heated non-stick frying pan until the entire bottom is coated (I used the pan from when I carmelised the onions for just a bit more sweet flavour)
  3. Wait until a thin skin has hardened across the entire top of the batter and then sprinkle sugar and cinnamon on one half of the crêpe. Then place the thinly sliced pieces of cream cheese on top of the sugar/cinnamon and dust with more sugar on.
  4. At this point fold the crêpe in half with a spatula, pressing it down so that the half without the sugar completely covers and solidly connects with the sugared half.
  5. Keep the folded crêpe on the stove until the sugar has melted, occasionally turning it over to prevent burning,
Coffee infused Chocolate Sauce

Chocolate Sauce (I used Smucker's Chocolate Topping)
Cold Coffee (I used some leftover in my french press)
  1. Heat the chocolate sauce in the microwave until very runny.
  2. Pour some into a bowl. Immediately pour the coffee over it.
  3. While the chocolate sauce is still hot, mix the two liquids together (I used a toothpick) until they are combined.
  4. Heat up the mixture in the microwave again and serve.
Plating instructions
Crêpe Sucre
Coffee Infused Chocolate Sauce
Ice Cream (I used Co-op Fudge Sundae Surpreme)
A Chocolate Cookie
  1. After cooking the crêpe, fold it again (into quarters) and place in the fridge to chill.
  2. After it has cooled, place it on a dish (warning, the sugar filling might spill out everywhere, it will still be a liquid)
  3. Add one scoop of ice cream onto the crêpe.
  4. Pour the sauce generously over the crêpe and the ice cream.
  5. Garnish with a piece of a chocolate cookie and serve.

NOTES:
  • The chocolate sauce tends to have a weak chocolate flavour and an even weaker coffee flavour so don't be afraid to use a lot.
  • The reason that this is called an 'instant' crêpe is that this recipe does not call for you to chill the batter like most crêpes - hence it is great for impulsive or impatient people like myself.

01 August 2009

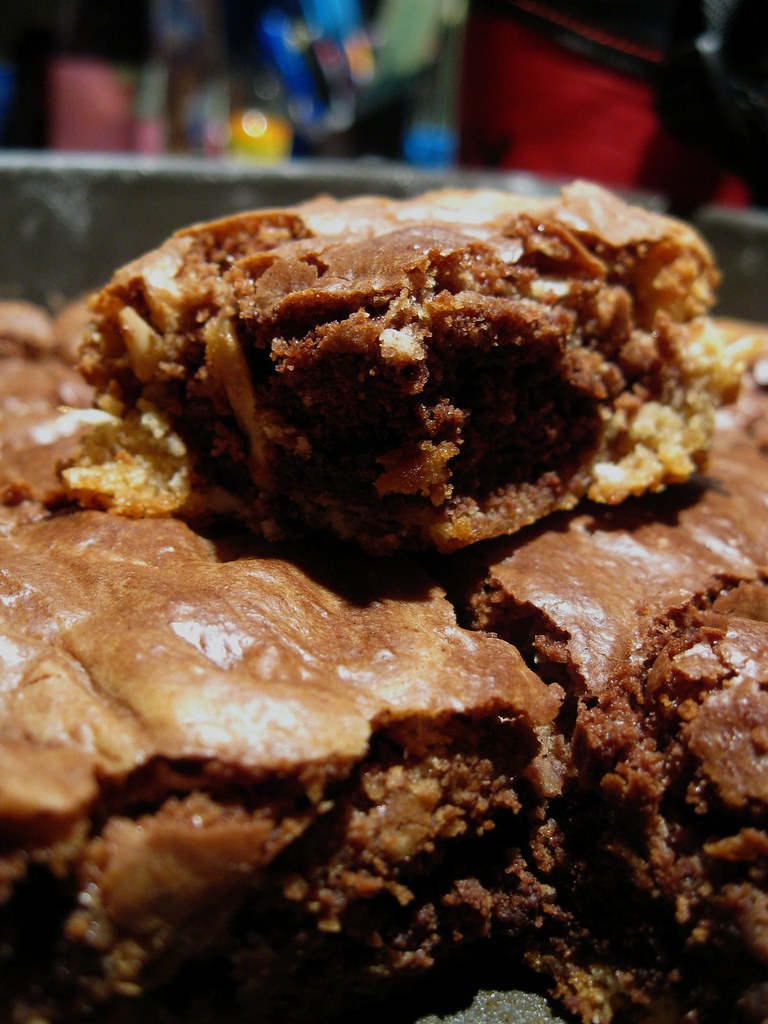
Triple Layer Brownies


The important thing to know about me before you read any further is that I have a terrible weakness for making pretty sweets. I love the process of finding recipes, I love imagining how they will taste, I love watching them take shape and I love photographing them. (Un)fortunately I don't really enjoy eating them all that much. As such I try to limit myself to making them only for parties or on special occasions few and far between (otherwise my house would be overrun with untouched, cookies, cakes, pies and cupcakes).

A few days ago, I finally gave in. I had been watching our horde of cookies slowly dwindle away into nothingness and as soon I saw there were only two cookies left, I grabbed my recipes, the internet and started looking for what to replace them with.

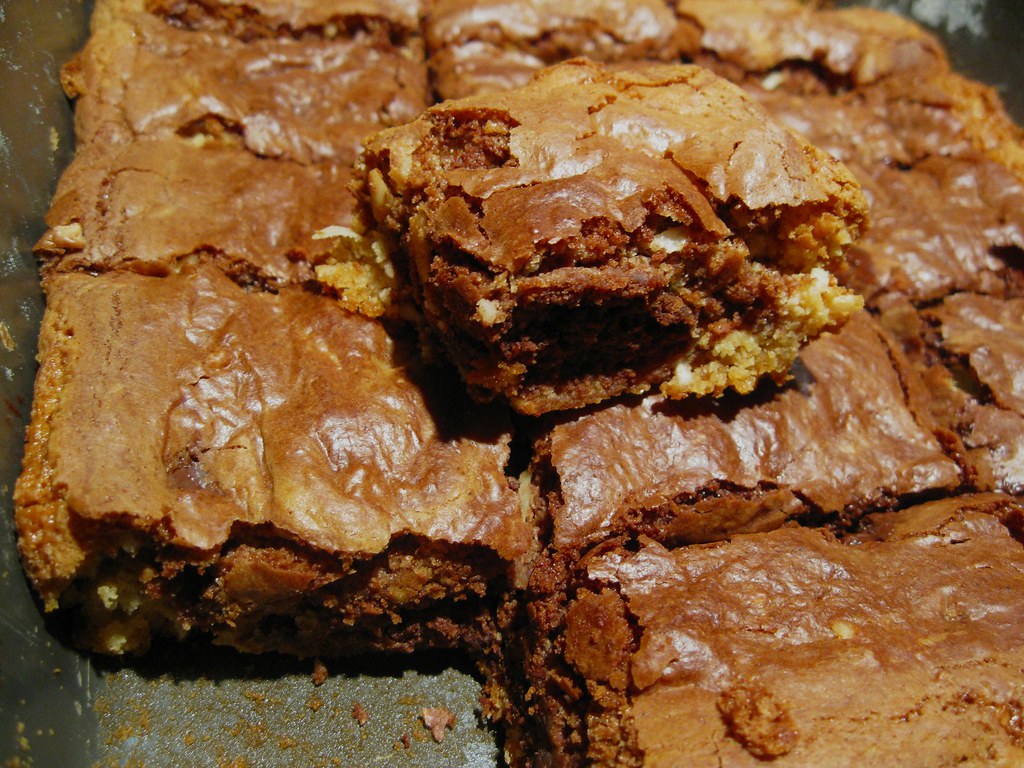
What I eventually found were two brownie recipes: Butterscotch-Coconut brownies and Blondie and Chocolate Marbled brownies. After some time of deliberation and a quick twitter straw poll, I decided not to make one or the other, but instead both... combined.

It was not as simple making both batters and throwing them into an 8x8 pan; they were different recipes so there would be need to be some acclimating. First of all, each brownie recipes were designed to stand alone, one filling the pan, let alone both. As such I needed to reduce the recipes' size. Unfortunately, where one was a recipe for an 8x8 batch of brownies, the other was for a 13x9 pan. This meant that I had to do a little more math than I originally intended.

After few quick calculations, I ended up with some rather odd fractions (such as 2/9 cup). To remedy this, I smudged a few numbers, cut and pasted, and came up with this as the final recipe.

Triple Layer Brownies
Butterscotch Coconut Mixture (set 1)
1/8 cup (25g) butter
1/2 cup brown sugar
1/2 egg (whisk an egg and then split into two bowls, use one)
1/2 teaspoon vanilla
3/8 cup flour
1/2 tsp baking powder
1/2 tsp salt
1/4 cup shredded coconut
--
Blondie Mixture (set 2)
1/3 cup vegetable oil
3/4 cup light brown sugar
1 cup flour
1 egg
2/3 tsp baking powder
1/3 tsp salt
1/6 cup nuts
--
To make the Chocolate Mixture (set 3)
1/4 cup chocolate chips
4 tsp cocoa

Preheat the oven to 350°F (luckily this was the same for both recipes). Butter and flour an 8x8 pan.
  1. Melt butter in a medium, heavy saucepan.
  2. In a large bowl, mix together oil and light brown sugar. Then add the whole egg and beat until smooth.
  3. In a separate bowl, sift together flour baking powder and salt (from set 2) and then add them to the brown sugar mixture. Mix well.
  4. At this point divide this mixture into two bowls (you can use the 'dry ingredients' bowl as your second bowl to save clean up) and set to aside.
  5. Stir brown sugar (from set 1) into the saucepan until incorporated.
  6. Cool slightly.
  7. Beat in vanilla and the half an egg.
  8. Sift in the flour, baking powder, and salt (from set 1) into the pan and stir to combine
  9. Fold in coconut.
  10. Spread the mixture on the bottom of the prepared pan.
  11. Into one of the two bowls you have (from before) add the chopped nuts (I used honey roasted macadamia but any will do) and stir well.
  12. Spread this mixture on the first layer in the pan
  13. Into the other bowl add the cocoa powder and chocolate chips.
  14. Spread this layer on top of the first two.
  15. Bake for 25-30 minutes or until a toothpick in the centre comes out clean.

NOTES:
  • The batter for all three of the layers was very thick (don't worry) and I would suggest spreading it with a knife, not a spatula.
  • It might be aethetically more pleasing to put the chocolate layer in the centre of the brownie instead of on the top. It would also then be easier to tell when the layer is fully spread out as both the blondie layer and the butterscotch layer are the same colour.
  • The brownies stuck to the plan (very sticky) so make sure that the pan is really buttered.